On Outlook for mobile, tap your profile icon → Settings → Automatic Replies and toggle it on.
You’re about to leave for a week. Maybe it’s a vacation, a conference, or just a string of back-to-back days where your inbox isn’t your priority. You set your status, pack your bag — and then someone emails you three times before noon because they didn’t know you were gone.
Setting an out of office reply in Outlook takes less than three minutes. But if you’ve never done it before, or you’re switching between the desktop app, the web version, and your phone, it’s easy to lose track of which settings panel you’re even looking at.
This guide walks you through every version — desktop, web, and mobile — with clear steps and ready-to-use message samples. By the end, you’ll have it done, and you’ll know exactly what to change the next time you need it.
Once it’s set, Outlook handles the rest. You just have to know where to look.
Table of Contents
Why Your Out of Office Message Matters More Than You Think
Most people treat the auto-reply as a formality. A one-liner that says “I’m out, back soon.” And that’s fine — it works.
But here’s the thing: your out of office message is often the only communication a sender gets from you for days. Done well, it reduces follow-up emails, sets clear expectations, and even reflects your professionalism when you’re not around to do it yourself.
Key Insight: According to Microsoft’s Outlook support documentation, automatic replies can be configured differently for contacts inside your organization versus those outside — a distinction most users never set up, but one that genuinely changes how useful the reply is.
A message that says “I’m out until the 14th — for urgent matters, contact Jana at jana@company.com” does real work. It stops the thread, redirects the right people, and means you come back to fewer fires. That’s worth two extra minutes.
How to Set an Out of Office Reply in Outlook on Desktop (Windows & Mac)
This is the most full-featured version. If you’re on the classic Outlook desktop app — whether Windows or Mac — this is where you want to be.
Step 1: Open the Automatic Replies panel
[Insert Screenshot/Image: Outlook desktop app with the “File” menu open, showing the “Automatic Replies (Out of Office)” option highlighted] Alt text: Outlook desktop app File menu with Automatic Replies option highlighted for setting out of office
Click File in the top-left corner of Outlook. In the panel that opens, look for Automatic Replies (Out of Office). Click it.
If you don’t see this option, you may be using a personal email account (like Gmail connected via IMAP) rather than a Microsoft Exchange or Microsoft 365 account. We’ll cover that workaround in a moment.
Step 2: Turn on automatic replies
[Insert Screenshot/Image: The Automatic Replies dialog box in Outlook desktop showing the “Send automatic replies” radio button selected, with date range fields visible] Alt text: Outlook Automatic Replies dialog box with send automatic replies selected and date range options
In the dialog box that appears, select Send automatic replies. You’ll see an option to set a specific time range — tick the Only send during this time range checkbox and enter your start and end dates. This is the setting most people skip, and it matters: without it, your auto-reply stays on until you manually turn it off.
Step 3: Write your message
[Insert Screenshot/Image: The Automatic Replies dialog showing two tabs — “Inside My Organization” and “Outside My Organization” — with a text field for the message] Alt text: Outlook automatic replies message editor showing inside and outside organization tabs
You’ll see two tabs: Inside My Organization and Outside My Organization. Write your message in each. They can be identical, or you can keep the external version more formal and include less internal context.
Step 4: Click OK
[Insert Screenshot/Image: The completed Automatic Replies dialog with a drafted message, showing the OK button at the bottom] Alt text: Completed Outlook out of office message ready to save with OK button
Click OK. Outlook will display a yellow notification bar at the top of your inbox confirming that automatic replies are on. That’s it.
Pro Tip: Set your end date one day after you return. That way, if you’re catching up on emails your first day back, people who write in before you’ve cleared your queue still get the context they need.
How to Set an Out of Office Auto Reply in Outlook on the Web
If you’re using Outlook on the web — the browser version — the path is slightly different but just as straightforward.
Step 1: Open Settings
[Image: Outlook web interface with the gear icon (Settings) highlighted in the top-right corner]
Click the gear icon in the top-right corner of the screen to open the Settings panel.
Step 2: Find Automatic Replies
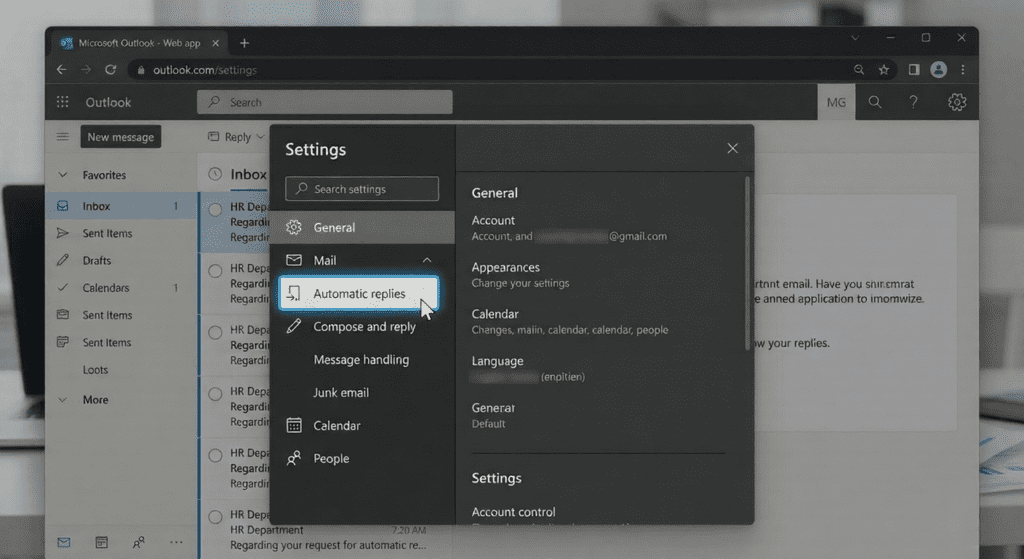
[Image: Outlook web Settings panel with the “Automatic replies” option visible in the left sidebar or search results]
In the Settings search bar, type “automatic replies” — it’ll appear instantly. Click it.
Step 3: Toggle it on and write your message
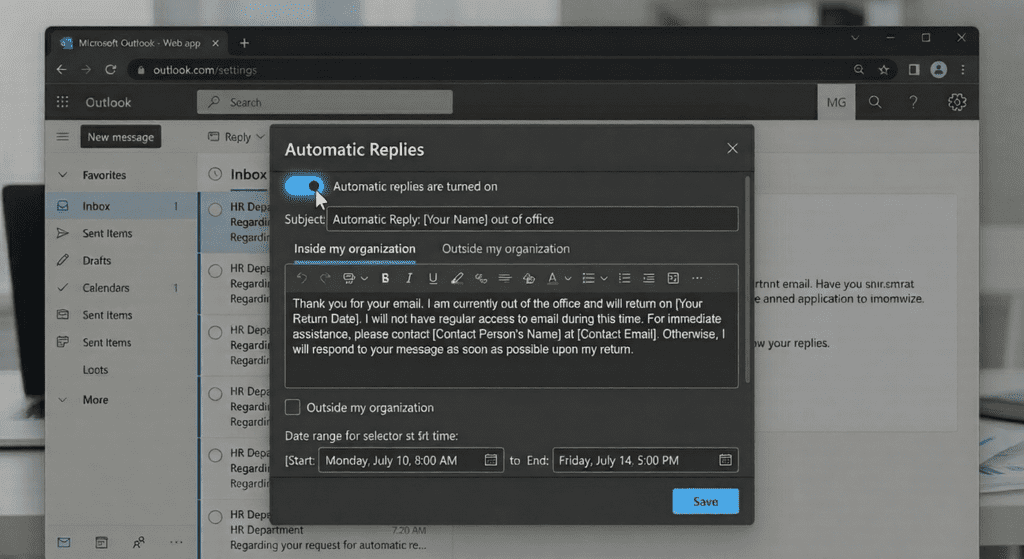
[Image: Outlook web Automatic Replies settings page with the toggle switch turned on and message fields visible]
Toggle Turn on automatic replies to the on position. Enter your message. As with the desktop version, you can set a time range and configure separate messages for internal and external senders.
Step 4: Save
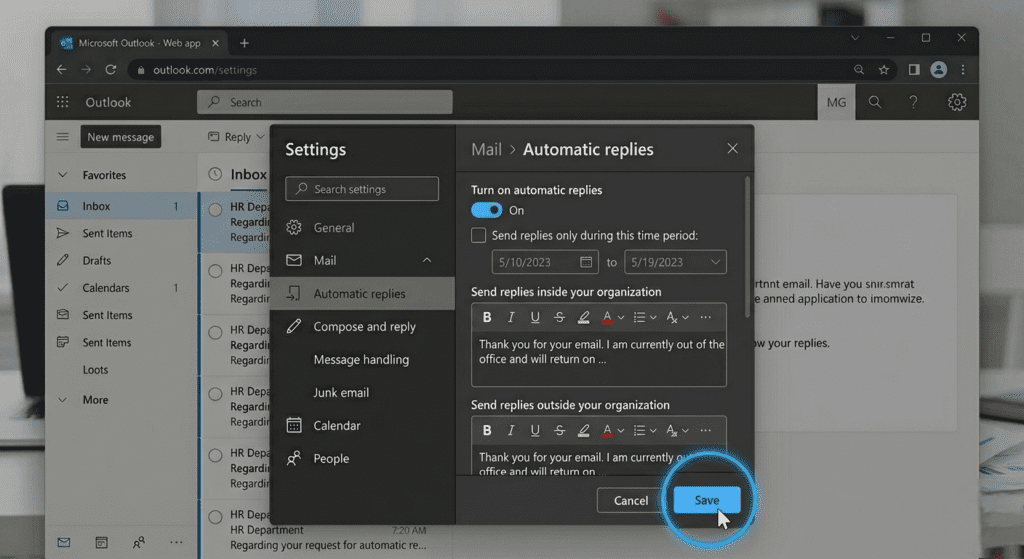
[Image: The Save button at the bottom of the Outlook web Automatic Replies settings page]
Click Save. Your auto-reply is now live.
How to Create an Out-of-Office Reply in Outlook on iPhone (and Android)
Setting your out of office reply in the Outlook mobile app — whether on iPhone or Android — takes about thirty seconds once you know where to look.
And that’s where most people get stuck. The option isn’t where you’d expect it.
Step 1: Tap your profile photo
[Insert Screenshot/Image: Outlook iPhone app home screen with the profile photo or initials icon in the top-left corner highlighted] Alt text: Outlook iPhone app showing profile icon tap location to access settings
Open the Outlook app and tap your profile photo or initials in the top-left corner of the screen. This opens your account sidebar.
Step 2: Go to Settings
[Insert Screenshot/Image: Outlook mobile sidebar showing the gear/settings icon at the bottom] Alt text: Outlook mobile app sidebar with settings gear icon at the bottom
Tap the gear icon at the bottom of the sidebar to open Settings.
Step 3: Select your account and tap Automatic Replies
[Insert Screenshot/Image: Outlook mobile Settings screen showing email accounts listed, with Automatic Replies option below] Alt text: Outlook mobile settings showing automatic replies option under email account settings
Tap on your email account. Scroll down to find Automatic Replies and tap it.
Step 4: Toggle on and write your message
[Insert Screenshot/Image: Outlook mobile Automatic Replies screen with the toggle switched on and a text field for the reply message] Alt text: Outlook iPhone automatic replies screen with toggle enabled for out of office message
Toggle automatic replies on. Type your message. On iOS and Android, you can also set a time range here. Tap the checkmark or Save to confirm.
Note: If your Outlook mobile account is connected via IMAP (common with Gmail or Yahoo accounts), the Automatic Replies option may not appear. This feature works reliably with Microsoft 365 and Exchange accounts.
Out of Office Message Samples in Outlook (Copy and Adapt These)
Writing the message itself is where most people stall. Here are four samples you can copy directly — adapt them to your tone and situation.
For a planned vacation (external contacts):
Thanks for reaching out. I’m currently out of office and will return on [date]. I won’t be checking email regularly during this time. For urgent matters, please contact [Name] at [email]. I’ll respond to your message when I’m back.
For internal colleagues:
I’m out this week attending [event/reason]. Back on [date]. For anything time-sensitive, ping [Name] on Teams or reach me there if it’s genuinely urgent. Otherwise, I’ll pick this up when I’m back.
For a short absence (1–2 days):
I’m out of the office today and will respond to emails on [date]. If this is urgent, call me directly at [number].
For extended leave:
I’m on extended leave until [date] and have limited access to email. Your message will not be forwarded. For immediate assistance, please contact [Name] at [email] or [phone].
Key Insight: The most effective out of office messages answer three questions: when you’ll be back, who to contact in the meantime, and whether the sender should expect a reply at all. Messages that skip any of these create follow-up emails — the opposite of what you want.
What to Do If You Don’t See the Automatic Replies Option
Some Outlook users — especially those using personal email accounts connected via IMAP — won’t see the Automatic Replies option in their File menu. This is a known limitation.
Here’s the honest reality: the full Automatic Replies feature requires a Microsoft Exchange or Microsoft 365 account. If you’re connecting a Gmail or Yahoo account to the Outlook desktop app, that option simply isn’t available through Outlook’s native settings.
Your workaround options:
- Use rules: In Outlook desktop, go to File → Manage Rules & Alerts → New Rule. You can create a rule that automatically replies to every message with a template. It’s less elegant and doesn’t stop after a set date, but it works.
- Set the reply in your email provider directly: If your email is Gmail, set the vacation responder inside Gmail’s settings instead. The reply will still go out — it just won’t originate from Outlook.
- Upgrade your account: If this is for work use, ask your IT team whether your organization uses Microsoft 365. That unlocks the full Automatic Replies feature.
The Difference Between Inside and Outside Your Organization
This is a small distinction that most guides quietly skip — and it’s worth knowing.
When you set an automatic reply in Outlook (on an Exchange or Microsoft 365 account), you get two separate message fields: one for people inside your organization and one for external senders.
Why does this matter?
Your internal colleagues probably don’t need your formal out-of-office response. They might need to know your Teams contact or which colleague is covering your projects. External senders — clients, partners, vendors — may not know your colleagues at all, so a different message serves them better.
Pro Tip: Keep your internal message casual and specific (“I’m at the conference Thursday and Friday — Slack is better than email this week”). Keep your external message professional and informative. They’re doing different jobs.
If you’re only writing one message and applying it to both, you’re not wrong — but you’re leaving a small, easy optimization on the table.
A Quick Comparison: Outlook Desktop vs Web vs Mobile
| Feature | Desktop App | Outlook Web | Mobile App |
|---|---|---|---|
| Set a date range | Yes | Yes | Yes |
| Inside/Outside org messages | Yes | Yes | No (single message) |
| Works with IMAP accounts | No | No | No |
| Easiest to access | File menu | Settings gear | Profile → Settings |
| Best for | Full control | Quick edits | On-the-go setup |
The desktop app gives you the most control. The web version is the fastest if you’re already in a browser. Mobile is ideal if you’re heading out the door and just remembered you forgot to set it.
Can I set an out of office reply in Outlook without an Exchange account?
How do I turn off my out of office reply in Outlook when I get back?
Does Outlook send the out of office reply to every email, or just the first one?
Why don’t I see the Automatic Replies option in my Outlook File menu?
Can I set different out of office messages for people inside and outside my company?
What happens to emails I receive while my out of office reply is on?
Can I schedule my out of office reply to turn on automatically before I leave?
Setting an out of office reply in Outlook is one of those tasks that takes two minutes and saves you far more than that. The three things worth remembering: always set a return date so senders know what to expect, use the inside/outside organization split if you have the option, and don’t leave the “who to contact” line blank — that’s the one that actually stops people from following up.
You now know how to do it on every version of Outlook: desktop, web, and mobile. The next time you’re heading somewhere, it takes less time to set than it does to explain why you forgot.
If you want more practical guides like this one, explore more at Geniostack.com — tools and tutorials built for people who’d rather get things done than read about getting things done.