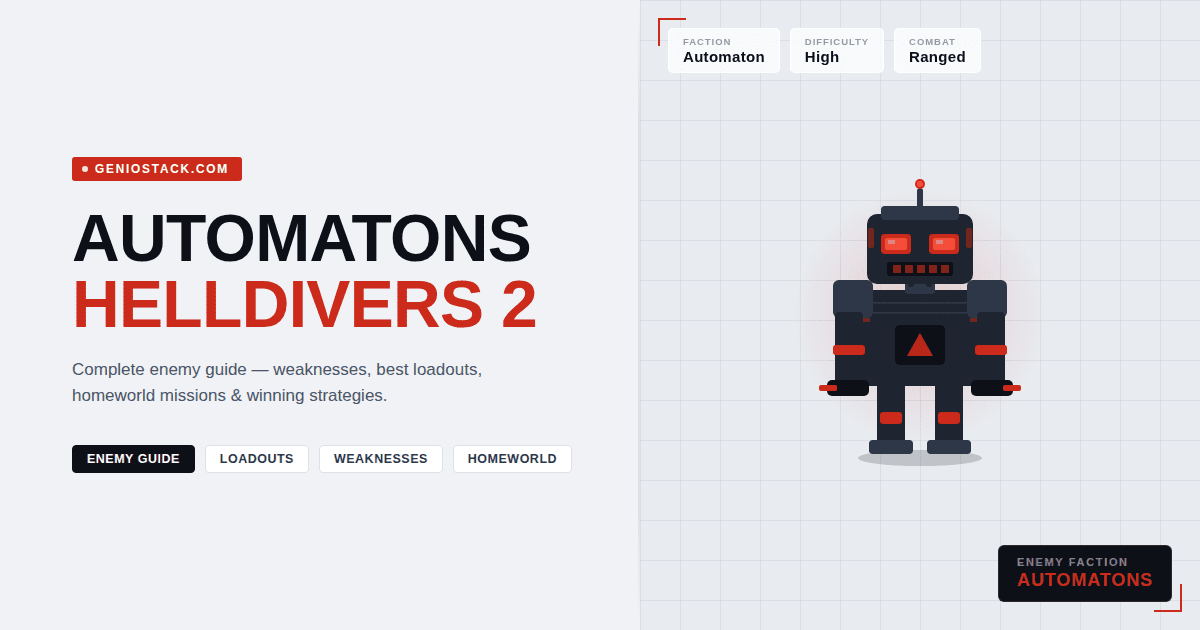
Automatons in Helldivers 2 are a robotic enemy faction that players encounter on the Western Front of the Galactic War. Unlike the Terminids, Automatons use ranged weapons, coordinated squad tactics, and armoured units that resist many standard loadouts. Knowing their enemy types, weaknesses, and patrol behaviours is essential to surviving higher-difficulty missions.
Struggling to push through bot-controlled planets? You’re not alone. The Automaton faction in Helldivers 2 is arguably the most strategically demanding enemy group in the game — not because of raw aggression, but because of how smartly they fight back. They suppress, flank, call in reinforcements, and field some of the toughest armoured units in the game.
Whether you’ve just unlocked the bot front or you’re pushing into Difficulty 9 operations deep in Automaton-controlled space, understanding how this faction works changes everything. This guide covers every major Automaton enemy type, their vulnerabilities, how to build an effective loadout, and what to expect when you take the fight to their homeworld.
By the end of this guide, you’ll know exactly which weapons to bring, which enemies to prioritise, and how to clear Automaton missions more efficiently — regardless of your difficulty level.
Table of Contents
What Are Automatons in Helldivers 2?
Automatons are one of the two primary enemy factions in Helldivers 2, alongside the Terminids (bugs). They are a militarised robotic force that has launched an invasion against Super Earth’s colonies, and they control a significant portion of the galaxy map on the Western side.
Unlike the Terminids, who rely on biological swarms and melee aggression, Automatons are a ranged and combined-arms faction. They use suppressing fire, coordinated attacks, and progressively heavier units as missions escalate. On higher difficulties, Automaton missions feel less like a bug hunt and more like fighting through a genuine military force.
Key insight: Automatons can call in Dropships to reinforce patrols when alerted. Eliminating the Dropship before it deploys can save enormous amounts of pressure in a firefight.
The faction is divided into infantry units, support bots, heavy walkers, and aerial units — each requiring different approaches to defeat effectively.
Helldivers 2 Automaton Enemies: Full Breakdown
Understanding the full roster of Helldivers 2 automaton enemies is the foundation of every successful bot mission. Here’s how each major type works:
Trooper (Scout Bot)
The basic infantry unit. Troopers are lightly armoured and easy to eliminate with any primary weapon. However, they move fast, fire accurately, and will call in reinforcements if not silenced quickly. Always prioritise any bot holding a flare — that’s your warning to eliminate them before a Dropship arrives.
Commissar
A faster, more aggressive variant that rallies nearby enemies. Commissars are dangerous because of their leadership role. Dropping one quickly reduces the coordination of nearby units. They’re not heavily armoured, so most primaries work fine.
Berserker
Dual-saw melee bots that charge directly at players. They’re fast, deal enormous melee damage, and are moderately armoured. Aim for their legs to slow them down or target the exposed torso for faster kills. In practice, Berserkers become one of the most threatening mid-tier enemies because players often underestimate their speed.
Devastator
A heavy infantry bot with a shield or heavy weapons. Shield Devastators block frontal fire and require flanking or grenades. Hulk Devastators wield powerful ranged weapons and require anti-armour to drop efficiently. These are the true mid-tier threats of the Automaton faction.
Hulk
One of the most dangerous heavy units in Helldivers 2. Hulks are massive mechanised walkers that fire sustained energy beams capable of wiping a squad in seconds. Their weak point is the vent on the back — landing shots there with an anti-materiel rifle or railgun will destroy them far faster than trying to chip away at their frontal armour.
Tank
Automaton Tanks are slow but devastating. They feature a rotating turret and extremely thick armour on most surfaces. The only reliable weak point is the rear vent. Use Stratagems like the Orbital Railcannon Strike or an EAT-17 to take them down quickly. Trying to engage a Tank with standard weapons is a common mistake that costs squads precious resources.
Factory Strider
The Factory Strider is one of the most formidable enemies in the entire game. It’s a massive walking factory that spawns Devastators mid-mission. Destroying it requires concentrated anti-armour fire to the undercarriage or use of multiple Stratagems. If one appears, treat it as an immediate squad priority.
According to community testing data tracked on the Helldivers 2 Wiki, the Factory Strider has among the highest effective health pools of any non-boss enemy in the game.

Automatons Helldivers 2 Weakness: Where to Hit and What Works
Knowing Automatons Helldivers 2 weakness patterns is what separates efficient squads from chaotic ones. Here’s a clear breakdown:
| Enemy | Primary Weak Point | Secondary Weak Point | Best Weapons |
|---|---|---|---|
| Trooper | Head | Torso | Any Primary |
| Commissar | Head | — | Any Primary |
| Berserker | Legs | Torso | DMR, Shotgun |
| Shield Devastator | Rear / Flank | — | Grenades, Railgun |
| Hulk | Back Vent | Leg joints | AMR, Railgun |
| Tank | Rear Vent | — | EAT, Orbital Strike |
| Factory Strider | Undercarriage | Leg joints | Multiple Stratagems |
Key takeaway: The majority of Automaton heavies share the same pattern — their frontal armour is near-impenetrable to most weapons, but their rear or ventilation weak points are significantly more vulnerable. Positioning and flanking matter far more on the bot front than they do against Terminids.
Explosive weapons and anti-armour Stratagems are consistently more effective against Automatons than against Terminids. Fire-based weapons, while strong against bugs, are generally less effective against the robotic faction.
Best Helldivers 2 Automaton Loadout
Building the right Helldivers 2 automaton loadout is mission-critical. The bot front punishes players who bring bug-focused builds. Here’s what works:
Primary Weapon Options
- Diligence Counter Sniper (DMR): Excellent for picking off Devastators and Troopers at range. Headshots kill most infantry instantly.
- Sickle: Energy-based, no resupply needed, and effective against most infantry-tier bots.
- Punisher Plasma: Exceptional against groups of Devastators due to its explosive projectile.
Secondary & Support
- Grenade Pistol: Destroys fabricators through vents, saving Stratagems for heavier threats.
- AMR (Anti-Materiel Rifle): The single best support weapon for bot missions. Hits Hulk vents reliably and handles Devastators with ease.
Stratagems
- Orbital Railcannon Strike: Single-target heavy hitter, ideal for Tanks and Hulks.
- Eagle Airstrike: Fast cooldown area denial, good for Fabricators.
- Shield Generator Pack: Drastically improves survivability against ranged Automaton fire.
- EAT-17 (Expendable Anti-Tank): Reliable anti-armour with frequent resupply cycles.
In practice, squads that carry at least two anti-armour options and one area-denial Stratagem handle Automaton missions more smoothly than those that double down on a single damage type.
The official Helldivers 2 game page on PlayStation provides faction-specific mission context for players looking to optimise their pre-mission preparation.
Automatons Helldivers 2 Walkthrough: How to Approach Bot Missions
A solid Automatons Helldivers 2 walkthrough strategy begins before you even land. Here’s a practical step-by-step mission framework for bot-front operations:
Step 1: Choose your difficulty and check the mission type. Eradication missions against Automatons are more forgiving than Blitz or Retrieve missions. Know what you’re signing up for.
Step 2: Build your loadout around anti-armour. Always bring at least one weapon or Stratagem capable of handling Hulks. Ignoring this will cause problems from Difficulty 5 onward.
Step 3: Move tactically between objectives. Automatons patrol predictably. Use cover, avoid open ground, and watch for Detector Towers — these expand patrol ranges and alert nearby units if not destroyed.
Step 4: Destroy Fabricators early. Automaton Fabricators are the source of enemy reinforcements. Grenades through the vent, or the Grenade Pistol, destroy them without wasting Stratagems.
Step 5: Handle Dropships proactively. When a Dropship approaches, shoot the engines to crash it — this kills the bots inside without giving the enemy the reinforcement benefit.
Step 6: Call in Stratagems at the right moment. Save heavy Stratagems for Hulks and Tanks rather than wasting them on infantry. This is the single most common resource-management mistake on the bot front.
Step 7: Extract efficiently. Automatons will push hard during extraction. Position defensively near cover rather than standing in the open while waiting for the Pelican.
Automatons Helldivers 2 Homeworld: What to Expect
The Automatons Helldivers 2 homeworld refers to the heavily contested planets deep within Automaton-controlled space on the Galactic War map. These are the toughest environments in the game, and they come with distinct challenges.
Automaton homeworld planets typically feature:
- Higher enemy density: Patrols are more frequent, and fabricator concentrations increase.
- Detector Towers: These massive structures scan entire regions of the map. Destroying them is a priority.
- Gunship Patrols: Airborne Automaton units that fire rockets and are resistant to most ground-level fire. Anti-air Stratagems like the Autocannon or Flak are highly recommended.
- Heavier unit compositions: Factory Striders and Tanks appear in much greater numbers compared to frontier planets.
Missions on Automaton core worlds are among the hardest in the game. In practice, teams that treat the homeworld like a normal bot mission will be quickly overwhelmed. Communication, role-specific loadouts, and objective prioritisation are non-negotiable at this level.
For Helldivers looking to sharpen strategy beyond what any guide can cover, exploring community discussion and build breakdowns at r/Helldivers on Reddit offers real-time meta insights and player-tested loadout comparisons.
Automaton vs. Terminid: Which Faction Is Harder?
This is one of the most debated questions in the Helldivers 2 community, and the answer depends significantly on your loadout and playstyle.
| Factor | Automatons | Terminids |
|---|---|---|
| Combat Style | Ranged, coordinated | Melee, swarming |
| Biggest Threat | Hulks, Tanks, Dropships | Chargers, Bile Titans |
| Weak Points | Rear vents, specific joints | Soft underbellies, leg strips |
| Best Weapons | Anti-armour, explosive | Incendiary, high-ROF |
| Strategic Priority | Destroy Fabricators | Close bug holes |
| Difficulty Spike | Scales sharply with tier | Scales through volume |
Most experienced players find Automatons more mechanically demanding because of their ranged accuracy and armoured variety. Terminids are more chaotic but more forgiving of loadout mistakes. Neither faction is objectively harder — they require different skills.
Best for new players: Start with Terminid missions to learn the core loop. Move to Automaton planets once you’re comfortable with Stratagems and positioning.
What are the strongest Automaton enemies in Helldivers 2?
What is the best loadout for Automaton missions in Helldivers 2?
What are the Automaton weak points in Helldivers 2?
What is the Automaton homeworld in Helldivers 2?
How do I stop Automaton reinforcements from calling in Dropships?
Are Automatons harder than Terminids?
Can you destroy Automaton Fabricators without Stratagems?
Automatons are the most tactically demanding faction in Helldivers 2, and mastering the bot front means understanding far more than which button to press. Here are the three most important takeaways from this guide:
- Know your enemies: Each Automaton unit has a specific weak point. Targeting rear vents on Hulks and Tanks is non-negotiable at higher difficulties.
- Build for the faction: Automaton missions demand anti-armour loadouts. Bring the AMR, EAT, or Railcannon — not bug-front builds.
- Play the objectives smartly: Destroying Fabricators, neutralising Detector Towers, and crashing Dropships before they land will reduce enemy pressure far more effectively than raw firepower alone.
The bot front rewards patience, positioning, and preparation over brute force. Once you internalise that, Automaton missions shift from punishing to genuinely satisfying.
Ready to dive deeper into gaming strategy, tools, and tech? Explore more guides and resources at Geniostack.com — your hub for smart, actionable content.